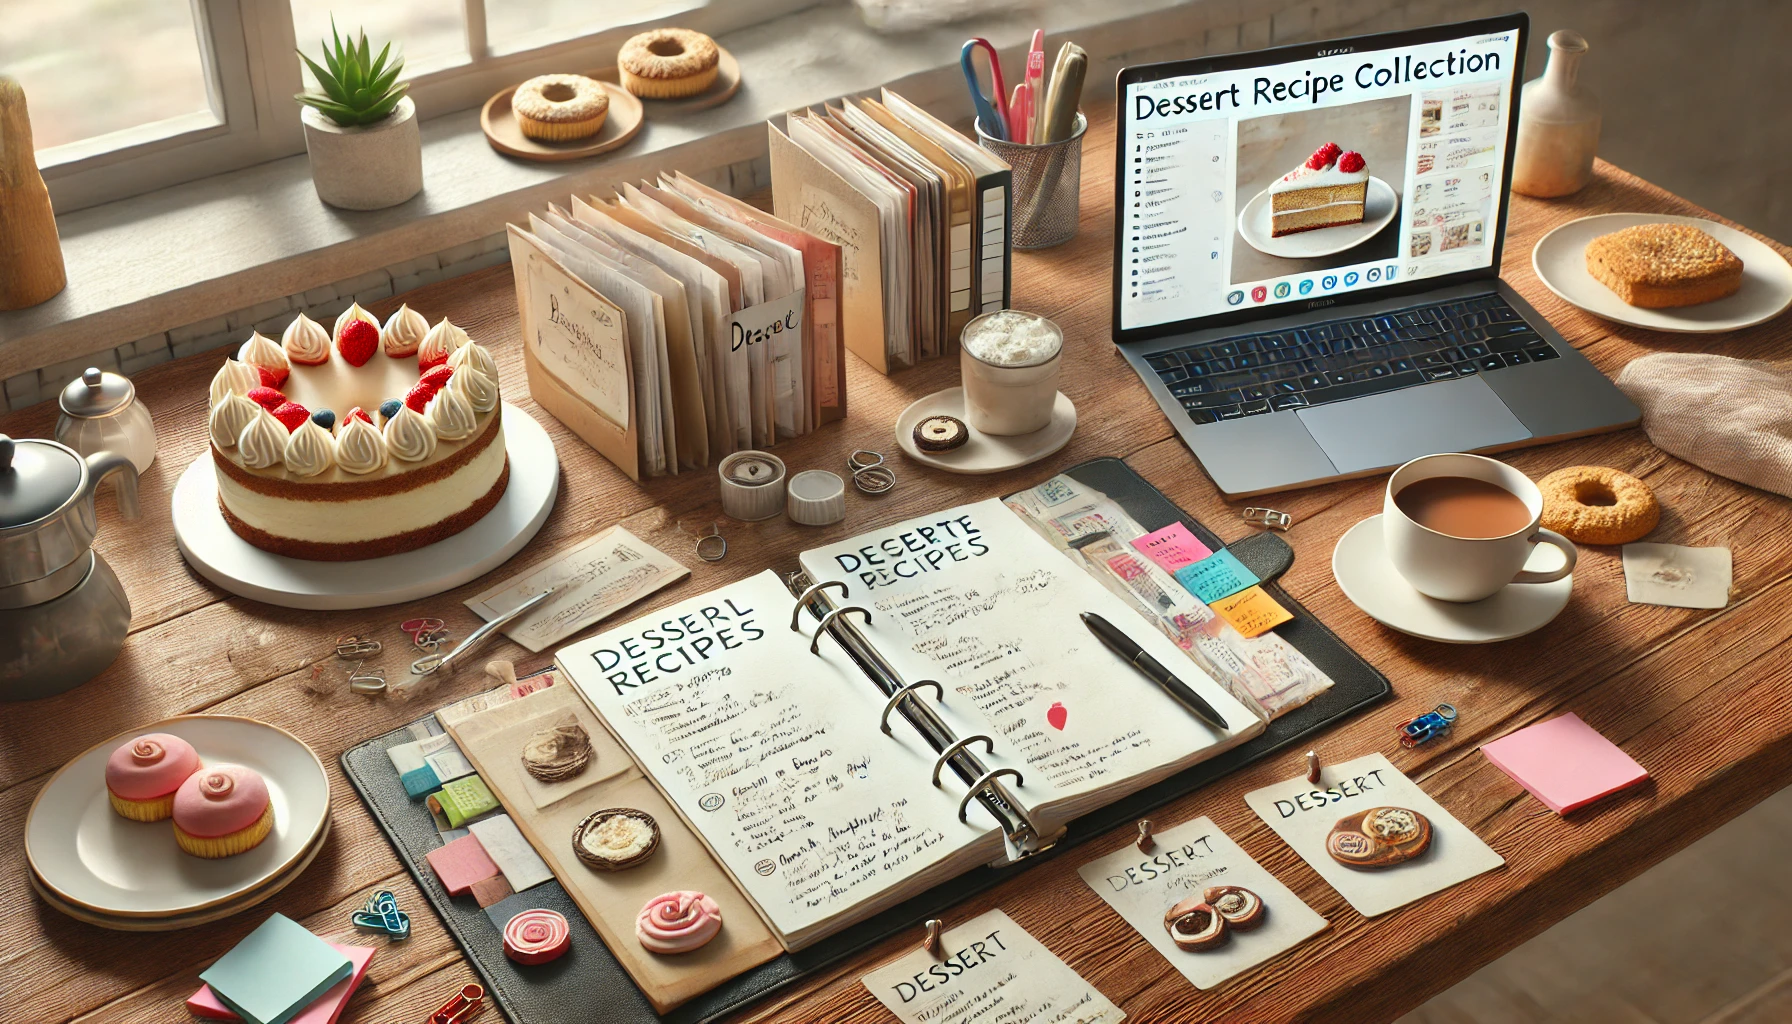
Every great baker has a secret stash — a go-to collection of tested, loved, and perfected recipes. Whether you’re a casual home baker or building a business, organizing your favorite desserts into a personal collection helps you bake better, faster, and with confidence.
In this guide, you’ll learn how to build, organize, and maintain your own dessert recipe collection — one that grows with you and becomes your sweetest legacy.
Why Keep a Personal Recipe Collection?
- Saves time when planning or baking
- Keeps your best creations in one place
- Lets you track changes and improvements
- Helps you share favorites with friends, clients, or online
- Becomes a beautiful reflection of your baking journey
Step 1: Gather All Your Recipes
Before you can organize your recipes, the first step is to collect everything you have scattered around. Most of us keep recipes in so many different ways — and sometimes forget about hidden gems! To start off strong, it’s essential to do a full “culinary hunt.”
Here are some places where your recipes might be hiding:
1. Handwritten notes and recipe cards
Those quick notes you jotted down on scraps of paper, old family notebooks, or classic recipe cards are real treasures. Even if they look messy, they carry valuable techniques and memories.
2. Screenshots on your phone
If you’re like most people, your phone gallery is probably filled with screenshots of recipes. Take a few minutes to scroll through and gather all these culinary inspirations.
3. Digital recipes from blogs and Pinterest
Food blogs, chefs’ websites, and Pinterest boards are endless sources of ideas. If you’ve saved links, PDFs, or notes digitally, it’s time to pull them together into one place.
4. Torn magazine pages
Many food magazines offer amazing, exclusive recipes. If you have stacks of torn-out pages hidden in drawers, cabinets, or boxes, now is the time to bring them all out.
5. Family recipes
Recipes passed down through generations are true treasures. They might be tucked away in your grandmother’s old notebook or scribbled on yellowed pieces of paper — no matter their condition, they deserve a special spot in your collection.
💡 Pro Tip:
Create a single folder for this initial stage, either physical (a large box or binder) or digital (a computer or cloud folder titled “Recipes to Organize”).
The goal at this point is to gather everything without filtering — just dump it all in one place. Think of it as a “creative deposit,” where you save all your recipes, old or new, successful or experimental. Organizing comes later!
Step 2: Choose a Storage Method
Now that you’ve gathered your recipes, it’s time to pick the perfect system to store and organize them. Choosing the right method depends on your personal style, your workflow, and how you like to interact with your recipes.
Ask yourself: Do you prefer flipping through pages or scrolling on a screen? Do you like something tactile and visual, or do you want the flexibility of digital access anywhere?
There’s no wrong answer — only what works best for you!
Here are some popular options to consider:
📘 Physical Storage Options
- Recipe Binder with Clear Sleeves:
A classic choice that keeps your recipes neat and protected. You can easily add, remove, or rearrange recipes as your collection grows. Use dividers to create sections like cakes, cookies, pies, and more. - Notebook with Index Tabs:
Perfect for those who love a handwritten touch. Choose a sturdy notebook and add tabs for quick access. You can personalize it with doodles, notes, or photos. - Recipe Box with Cards:
Traditional and charming. Write each recipe on an index card and organize them alphabetically or by category. It’s also a beautiful heirloom to pass down someday. - Printed and Laminated Sheets:
If you bake often and worry about spills, laminated sheets are ideal. Print your favorites and protect them with plastic covers so they stay clean, no matter how messy your kitchen gets!
💻 Digital Storage Options
- Google Docs or Sheets:
A simple, free way to create an easily searchable database of your recipes. Plus, you can access your collection from any device. - Notion or Evernote:
If you love organizing with tags, links, and images, these apps are fantastic. You can create your own customized digital cookbook, complete with photos and notes. - Pinterest Boards:
Great for saving visual inspiration. You can create separate boards for different dessert types and pin your favorite recipes, tips, and tutorials. - Recipe Management Apps (e.g., Paprika, Whisk):
These specialized apps are designed to store, categorize, and even generate shopping lists based on your recipes. Some also allow you to rate, tag, and make notes on your cooking experience.
💡 Tip:
You don’t have to pick just one! Many bakers like using a hybrid system — for example, keeping a physical binder for family recipes and a digital app for quick weeknight bakes. The key is finding what feels natural and sustainable for you.
Step 3: Organize by Category
With all your recipes gathered and your storage method chosen, it’s time to bring order to the collection. Sorting your recipes into clear, helpful categories makes it much easier to find what you need — whether you’re planning a party, craving something specific, or baking on a whim.
Think about how you naturally look for recipes. Would you search by type of dessert, dietary needs, or even by season? Building your collection around intuitive categories keeps everything neat and easy to navigate.
Here are some category ideas to get you started:
| Category | Examples |
|---|---|
| Cakes | Chocolate, sponge, vegan, layered |
| Cookies | Drop cookies, bars, sandwich cookies, holiday cookies |
| No-Bake Desserts | Mousse, panna cotta, raw bars |
| Pies & Tarts | Fruit pies, nut tarts, cream pies |
| Frostings & Fillings | Ganache, buttercream, curds |
| Special Diets | Gluten-free, keto, dairy-free |
| Seasonal Treats | Summer fruit desserts, winter spice cakes |
Feel free to create as many categories as you need — or even combine a few if that fits your style better. The goal is to make your recipe collection work for you, not feel overwhelming.
Tips for Organizing:
- Use tabs or dividers in your physical binder or notebook to separate each category.
- Create digital folders or tags for each group if you’re organizing online.
- Color-code your sections if you’re a visual organizer — for example, green for healthy recipes, red for holiday treats.
- Leave room for growth! You’ll likely keep adding new favorites over time, so make sure your system can expand easily.
💡 Pro Tip:
Start simple! You can always adjust and refine your categories as your collection grows. It’s better to begin with a flexible system than get stuck trying to make it perfect from day one.
Step 4: Standardize the Format
Once your recipes are sorted into categories, the next important step is to rewrite them in a clear, consistent format. A well-organized recipe isn’t just easier for you to follow — it also makes your collection more polished, professional, and shareable with others.
Think of this like giving each recipe a fresh coat of paint. Small improvements now will save you a lot of time and frustration later when you’re in the middle of baking!
Here’s what every recipe should include:
📝 Essential Elements:
- Title:
A simple, descriptive name. (Example: “Classic Chocolate Chip Cookies” or “Vegan Lemon Tart.”) - Prep and Bake Time:
Clearly state how long it takes to prepare and bake or chill. This helps when planning your baking schedule. - Yield:
Mention the number of servings, cookies, slices, etc. Example: “Makes 12 muffins” or “Serves 8.” - Ingredients (in order of use):
List all ingredients in the exact order they are used in the instructions. Use clear measurements and avoid vague terms. - Step-by-Step Instructions:
Break down the method into simple, numbered steps. Keep sentences short and easy to follow, even for beginners. - Notes:
Add any extra tips like:- Storage advice (e.g., “Keeps fresh for 3 days at room temperature”)
- Ingredient substitutions
- Variations (“Try adding walnuts for extra crunch!”)
- Adjustments based on baking equipment or altitude
💡 Pro Tip:
When you’re standardizing, imagine you’re writing for someone who has never baked the recipe before. Clear, complete directions make the experience smoother — and future-you will definitely thank you!
Step 5: Test and Rate
Having a beautiful collection of recipes is just the beginning — now it’s time to put them to the test! Testing and rating your recipes ensures that only the best make it into your permanent collection. Plus, it helps you bake with confidence, knowing you’ve already worked out any potential issues.
Think of this step as quality control for your personal cookbook.
🧁 How to Test and Rate:
- ✅ Mark as Tested and Approved:
Once you bake a recipe and are happy with the result, mark it as “Tested and Approved.” You can use a small checkmark next to the title or create a “Tested” section in your binder or app. - ⭐ Assign a Star Rating:
Give each recipe a star rating — for example, from 1 to 5 stars — based on how much you enjoyed the final product. This makes it super easy to find your top go-to recipes later. - 💬 Add Personal Notes:
After testing, jot down quick notes:- What worked really well? (e.g., “The texture was perfect after chilling overnight.”)
- What didn’t go as expected? (e.g., “Needed 5 extra minutes in the oven.”)
- What would you tweak next time? (e.g., “Try using dark chocolate instead of milk chocolate.”)
Why Testing and Rating Matters:
- You build a stronger, more reliable recipe collection over time.
- You avoid repeating mistakes by keeping track of improvements.
- You create personalized versions of recipes that suit your taste.
- You save time when choosing what to bake next — no more guessing if a recipe will turn out well!
💡 Pro Tip:
Make testing fun! Invite friends or family for a tasting session, gather feedback, and even have a little rating party. Baking becomes even more joyful when you share the process.
Step 6: Make It Personal
Your recipe collection should be a true reflection of you — your tastes, your memories, and your style. Personalizing it not only makes it more fun and meaningful, but also turns your collection into something truly unique and inspiring.
Think of it as crafting your very own cookbook — one that tells the story of your baking journey.
🎨 Ways to Make It Personal:
- Add Photos:
Include photos of your own creations next to each recipe. Even simple snapshots taken with your phone can make your collection come alive. - Write Personal Stories:
Share a few sentences about why a recipe matters to you — maybe it’s the cake you always baked for birthdays or the cookies you made with your grandmother. - Incorporate Favorite Quotes:
Baking quotes, motivational sayings, or even fun notes about kitchen adventures can add charm and personality to your pages. - Design a Custom Cover:
If you’re making a physical binder or a digital collection, create a personalized cover with your name, a favorite photo, or a fun title like “Emma’s Sweet Collection” or “The Sweet Side of Life.” - Create Themed Sections:
Organize recipes into special themes such as:- Holiday favorites
- Childhood memories
- Crowd-pleasers for parties
- Quick weekday treats
- Family heritage recipes
Personal touches make flipping through your collection a true delight — and turn a simple set of recipes into a keepsake you’ll treasure for years.
💡 Pro Tip:
Don’t wait until your collection is “perfect” to start personalizing it. Add little touches as you go. Your recipe archive should grow and evolve just like your baking skills!
Step 7: Keep It Updated
A great recipe collection isn’t something you create once and forget — it’s a living, evolving project. As you grow as a baker, discover new favorites, and tweak old recipes, your collection should grow and change right along with you.
Keeping your collection updated ensures it always reflects your best work and your current tastes.
🔄 How to Keep Your Collection Fresh:
- Add New Favorites Regularly:
Whenever you test and love a new recipe, don’t just bookmark it mentally — add it properly to your collection with full details, notes, and a rating. - Remove Duds:
If a recipe didn’t turn out well, or if you find something better, don’t be afraid to retire the old one. Your collection should be filled with winners! - Update Tweaks and Improvements:
Over time, you might make small adjustments that improve a recipe — like adding an extra splash of vanilla or reducing the sugar. Always update your notes so your future self remembers these changes. - Back Up Digital Collections:
If you’re organizing recipes digitally, make sure you back up your files regularly. Save copies to cloud storage (like Google Drive or Dropbox) so your hard work is protected. - Review Seasonally:
Set a reminder to review your collection a few times a year — especially before major baking seasons like the holidays — to make sure everything is up-to-date and ready to inspire you.
💡 Pro Tip:
Treat your collection like a beloved garden: water it, prune it, and let it bloom with your creativity. The more attention you give it, the more rewarding it becomes!
Bonus: Turn It into a Gift or Product
Once you’ve built a personal collection full of tested, loved, and beautifully organized recipes, why not share your sweet legacy with others?
Your recipe archive can become much more than a private project — it can be a heartfelt gift, a professional tool, or even a product you offer to the world.
Here are some creative ways to turn your collection into something special:
🎁 Gift Ideas:
- Printed Booklet for Friends and Family:
Create a small printed version of your favorite recipes. It can be a holiday gift, a wedding present, or a thoughtful birthday surprise for someone who loves baking. - Keepsake Family Cookbook:
Combine family recipes into a beautiful heirloom cookbook that can be passed down to future generations — preserving not just the instructions, but the memories behind them. - Personalized Recipe Cards:
Design elegant recipe cards featuring your top bakes. These make charming, meaningful gifts for holidays, housewarmings, or bridal showers.
💼 Professional Ideas:
- Mini Ebook to Share Online:
If you have a blog, a business, or a strong social media presence, turn your best recipes into a downloadable ebook. It’s a great way to build your audience or offer a freebie to email subscribers. - Recipe Archive for Your Baking Business:
If you bake professionally, a well-organized recipe archive can streamline your workflow, train new staff, and ensure consistency in every batch. - Content for Workshops or Classes:
Use your collection as teaching material if you ever offer baking classes, workshops, or online tutorials. A polished recipe guide can add incredible value to your courses.
💡 Pro Tip:
If you’re planning to share or sell your recipes, make sure they are thoroughly tested, clearly written, and beautifully presented. First impressions matter — and your collection deserves to shine!
Final Thought: Your Sweetest Legacy
Your personal recipe collection is so much more than a simple archive of instructions — it’s a living, growing reflection of your creativity, dedication, and passion for baking.
Each handwritten note, each tested tweak, each perfected dessert tells a piece of your story.
Whether you keep your collection tucked inside a notebook, organized in a digital library, or proudly printed and shared with others, it represents your journey — from your very first cookies to your most spectacular cakes.
As you continue to bake, learn, and create, your collection will evolve right alongside you. It will not only make your baking better and faster, but also leave a lasting mark — a sweet legacy for yourself, your loved ones, and maybe even future generations.
So start gathering, keep experimenting, and treasure every delicious step along the way.
Your sweetest creations — and memories — are still ahead. 📖🍰💛
Every baker knows the joy of having a trusted recipe collection that grows with experience. Starting with a simple “recipe dump” and sorting them into clear categories can make baking more efficient and enjoyable. Personalizing your collection with your unique touch adds a special charm to your baking journey. Experimenting and refining your recipes over time ensures each bake is better than the last. How do you organize your favorite recipes to make your baking process seamless?
Thank you for sharing your thoughts! 🌟 I completely agree — starting with a simple “recipe dump” and gradually shaping it into a personalized collection makes such a difference. I usually organize my favorite recipes by category first (like cakes, cookies, seasonal treats), and then I add notes, ratings, and even photos as I go. It really helps make the baking process smoother and more creative! How do you like to personalize your collection?
Great tips for organizing and perfecting your baking recipes! Having a go-to collection can really boost your confidence and efficiency in the kitchen. Rewriting and marking up recipes ensures consistency and improvement over time. Personalizing your recipe collection makes the process even more enjoyable. Have you noticed a difference in your baking since organizing your recipes?
Thank you so much for your kind words! 🌟 I completely agree — having an organized and personalized recipe collection really changes the game. Since organizing my recipes, I’ve definitely noticed a big difference: I bake with much more confidence and it’s so much easier to tweak and improve my creations. Plus, it feels so rewarding to look back at my notes and see how much I’ve grown over time. How about you? Have you built your own recipe collection too?